 Quick Navigation
 All projects
  Hardware
 Links
Links Top projects
Alan numitron clock
Clapclap 2313/1386
SNES Pi Webserver
USB Volume/USB toys
Smokey amp
Laser cutter
WordClock
ardReveil v3
SNES Arcade cabinet
Game boy projects
cameleon
Home Presence Detector
 GitHub
AlanFromJapan
 Contact me
 Who's Alan?
Akizukidenshi
Elec-lab
Rand Nerd Tut
EEVblog
SpritesMods
AvrFreaks
Gameboy Dev
FLOZz' blog
Switch-science
Sparkfun
Suzusho
Datasheet Lib
Reddit Elec
Ermicro
Carnet du maker (fr)
drill battery from laptop battery
Last update: Tue Feb 17 20:52:01 2026
 I looooove woodworking, my heart always balances between that and electronics. I work on it to get better, so I get to guy tools. But I'm cheap, and I decided to buy a cheap drill powered battery (a Bosch if you care) with old dead 14.4v Ni-Mh batteries. I got changed the battery of my office laptop the other day and got to keep the old ones; they would still last 1h30 but after that they'd let me down. But it's enough for drilling a few holes!
So let me explain how I did it...
Principle
DISCLAIMER (especially for the trolls)
I know this is not the optimum way to make a multiple cell Li-Ion charger. I can already see the foam on the lips of internet trolls.
I like the idea of reusing different components, combining them together and making them work as one. Like this charger. I know that if I spent a few hours on mouser I'd find a component that do just what I want for a few bucks, or maybe an already-made module on eBay for 10 bucks... but I like the challenge, I like the "rusticity" of the build, it's gonna be unique, clickety, with bling bling, clumsy, and maybe a fire hazard. So just don't make the same as me, but you're free to watch.
PS: yes I know I made a few blunders in this project, mainly I must have been very tired when this idea of optocoupler came to me where a simple pull-up would have sufficed. Don't hit a man on the ground please, he's ashamed enough.
Schematics

Schematics for just 2 batteries but you get the idea: MCU controls the relays via transistors and reads the led status of the Li-Ion charger module
Bill of materials
For the battery:General principle
If the 4 liion batteries were in parallel, since they come from the same pack originally, one could assume it's safe to charge them in parallel. However one would have only ~4v output and one would sit on his drill because it would never turn...So the liion cells are in serie, the 4 of them for an output that will be in the range [14.8 ~ 16.8]. That's more than the nominal of the drill, but it's just a motor, and it will just eat a +10% overvoltage, so nothing to worry much about. Plus it's a drill which you run by bursts, not continuous so we'll live with it.
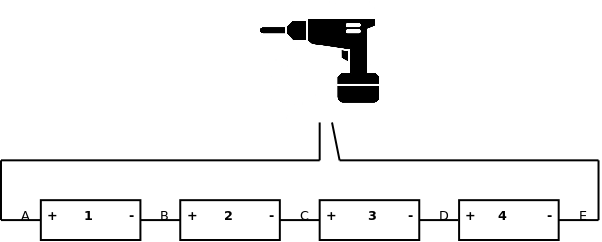
When the drill is operated, circuit is closed and all work as a serial bank of batteries. Now problem is when to charge: you can't charge liion in serie (nope). So simple solution is to isolate each cell and charge them individually. In the above schema, to charge cell (1), you connect the point (A) to the (Bat+) of the charger, (B) to (Bat-) and you're in business! Electrons will flow between these points only, leaving the other celles untouched. Then to the next cell, plug (B) to (Bat+) this time, (C) to (Bat-) and repeat. That pluging thing is done by some MOSFET I guess on the charging board that is in the laptop battery. In my case, because I didn't thought of it preferred to use small relays I bought before. More seriously, with relays I get a physical connection and disconnection of the circuit. I felt more safe for now due to my current knowledge of Liions cells and MOSFETs (*cough cough* rationalization).
| Action | A | B | C | D | E |
| Use the battery | ⊕ | x | x | x | ⊝ |
| Charge cell 1 | Bat+ | Bat- | x | x | x |
| Charge cell 2 | x | Bat+ | Bat - | x | x |
| Charge cell 3 | x | x | Bat + | Bat - | x |
| Charge cell 4 | x | x | x | Bat + | Bat - |
Wiring: as mentionned, I use a 5 pin GX-12 connector you can easily find on eBay. And since each time I wonder: GX-12 Pin 1 = Positive (point A in above diagram) and Pin 5 is Negative (point E in the said above diagram).

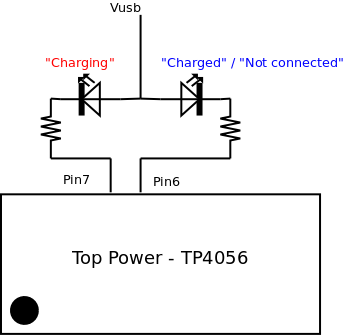
Last part: when to stop? Easy. Those 2 USD chargers have leds, so just read their status. I used some optocoupler which is an overkill because we're operating on the same power source (USB) so no need to isolate, and now 2 weeks later as I type this I understand I should have used the config of the leds on that chip as a pullup: the pins 6 & 7 of the TP4056 are high impedance (not at same time), I should have soldered the resistor in place of the led and measure voltage there with my ATtiny26 (pullup so high if led should be off, low if led should be on)... anyway, now it's done and glued so I'll live with it an my over engineering of 30 JPY.
Source code
All the source code on GitHub as usual.Pictures
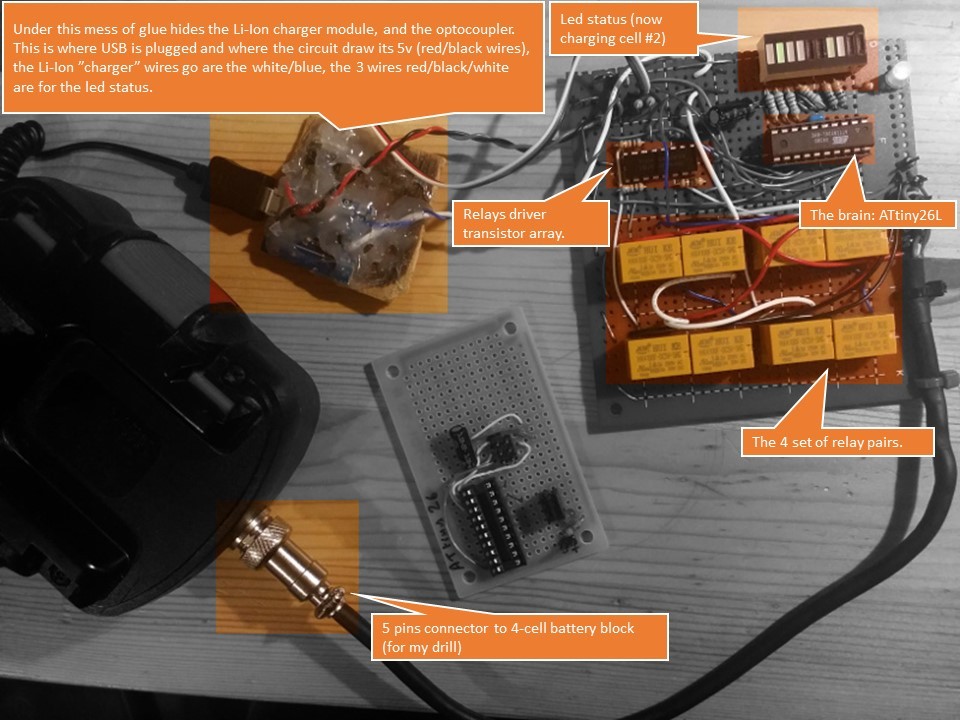
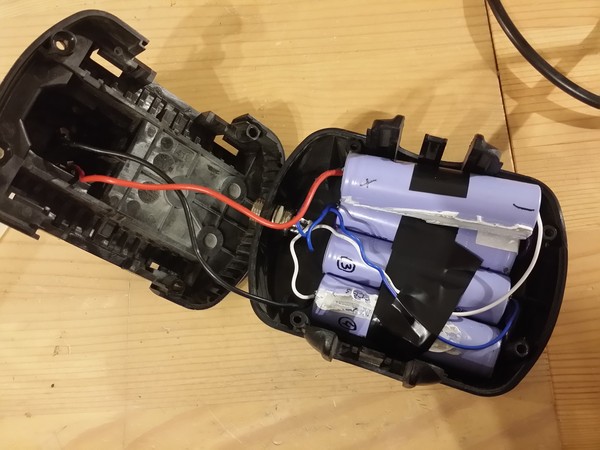
Inside a refurbished battery
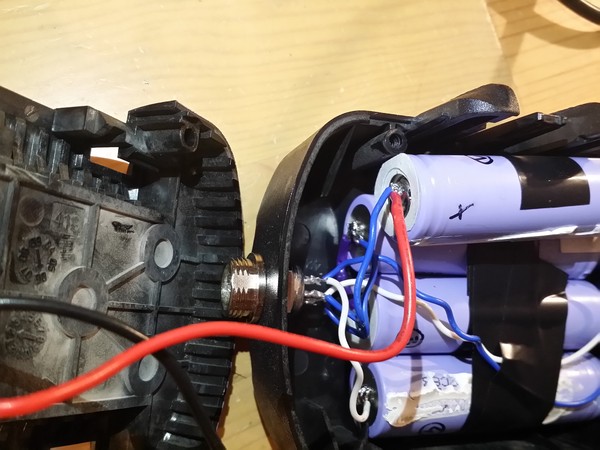
Inside a refurbished battery before drowning everything in snortglue for stability and insulation
The final version, on the wall in its box, charging a battery
electrogeek.tokyo ~ Formerly known as Kalshagar.wikispaces.com and electrogeek.cc (AlanFromJapan [2009 - 2026])